# Master Application Deployment: From Git Push to Production on Any Hardware
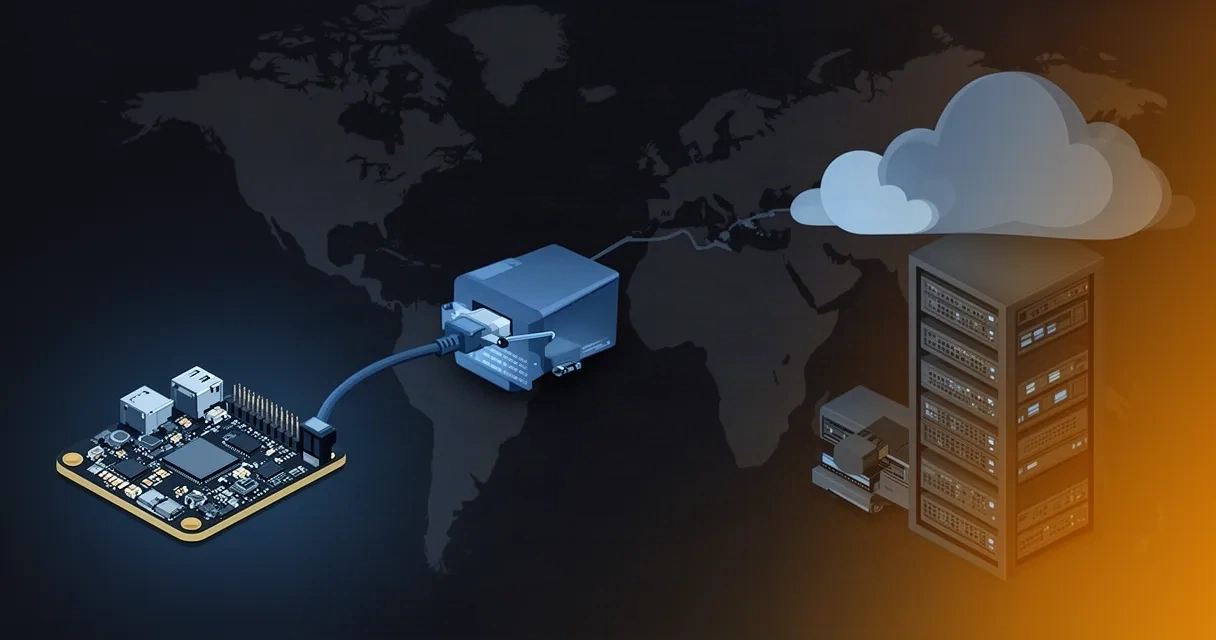
Application deployment is one of the most critical yet often misunderstood aspects of software development. At its core, deployment is the process of moving code from a development environment into production—the live system where real users interact with your application. Yet deployment means something different depending on your infrastructure, team size, and business requirements.
The stakes are high. A poorly executed deployment can cause downtime, data loss, or security breaches. A well-planned deployment process, by contrast, lets teams ship features faster, roll back mistakes quickly, and maintain stability across their entire infrastructure. Whether you're running a single application on a Raspberry Pi in your home or managing dozens of services across cloud regions, understanding deployment fundamentals is essential.
This guide explores the full spectrum of application deployment: from traditional enterprise models to lightweight self-hosted approaches, security best practices, and the practical workflows that make it all work.
## What Is Application Deployment and Why It Matters
Application deployment is the complete process of preparing, releasing, and running software in a target environment. It includes several distinct phases: planning what will be deployed, building the application package, configuring the runtime environment, transferring the code to production infrastructure, starting services, and continuously monitoring health and performance.
Deployment differs from release management and version control, though the terms are sometimes used interchangeably. A release is a versioned bundle of code and configuration ready for deployment; deployment is the act of installing and activating that release. You might release version 2.0 of your application but deploy it gradually to different user segments or geographical regions.
Why does deployment matter so much? Consider these real-world impacts:
Velocity and agility. Teams with reliable deployment processes can push updates multiple times per day. Teams without automation often batch changes into quarterly releases, making them slower to respond to bugs or market opportunities.
Risk reduction. Repeatable, scripted deployments eliminate manual errors. A human following a checklist might forget a step or misconfigure a setting; an automated pipeline does it the same way every time.
Visibility and accountability. A formal deployment process creates an audit trail. You know exactly which code version is running, who approved the deployment, and when it happened.
Cost efficiency. Deploying to the right hardware—whether that's your own server, a Raspberry Pi, or cloud infrastructure—lets you avoid paying for resources you don't need.
User experience. Downtime directly harms users and damages trust. Robust deployment strategies like rolling updates and blue-green deployments keep services running while updates roll out.
Without a structured deployment process, shipping code becomes chaotic and risky. With one, deployment becomes a reliable, repeatable system that the entire team understands and can execute consistently.
## Traditional Deployment Models vs. Lightweight Self-Hosted Approaches

The deployment landscape has historically been divided between two camps: enterprise-scale platforms and DIY infrastructure.
Traditional enterprise models typically involve:
- Centralized infrastructure teams. Only ops staff can configure servers or deploy applications.
- Long lead times. Provisioning a new server takes weeks; deploying code follows formal change management.
- Vendor lock-in. You build on a platform's proprietary APIs and tools, making switching expensive.
- High abstraction. Developers hand code to ops, who handle the rest. What happens in production feels like a black box.
- Cost overhead. You pay for managed services, support contracts, and compliance certifications even if you don't use all features.
Platform-as-a-Service (PaaS) emerged to simplify this: developers push code, the platform handles servers, databases, and scaling. Services like Heroku became popular for their ease of use. The trade-off: you sacrifice control, flexibility, and often incur higher costs as your application scales.
Lightweight self-hosted deployment offers a middle ground. Rather than managing bare-metal servers yourself or handing complete control to a vendor, you:
- Deploy applications to infrastructure you own or control: your own servers, Raspberry Pi devices, or simple cloud instances.
- Use open-source tools and standards rather than vendor-specific platforms.
- Retain full visibility and control over configuration, data, and security.
- Avoid vendor lock-in; your deployment process works wherever Linux runs.
- Scale incrementally based on actual need, not pricing tiers.
- Use Git-based workflows where a simple push triggers automated deployment.
This approach is particularly powerful for:
- Small teams and solo developers who want simplicity without paying PaaS premiums.
- Privacy-conscious organizations that need data to stay on their own infrastructure.
- Distributed or edge deployments where you need applications running on dozens of different devices.
- Development and staging environments where you control costs by using modest hardware.
The key difference from traditional enterprise deployment is automation. Instead of lengthy runbooks and manual coordination, lightweight self-hosted deployment uses code and scripting to automate every step. Instead of "deployment committee approves change" followed by "ops team follows 47-step process," it's "developer pushes to main branch" and a pipeline handles the rest.
## Core Application Deployment Workflow: Plan, Build, Deploy, Monitor
Every application deployment, regardless of scale or platform, follows a core workflow: plan, build, deploy, and monitor. Understanding each phase helps you design reliable processes.
Plan Phase
Planning answers critical questions before any code moves to production:
- What are we deploying? A specific version number, Git commit hash, or release tag. You must know exactly what code will run.
- Where are we deploying? Which servers, regions, or devices receive the update.
- Who approved this? Track authorization and maintain audit trails.
- What's the rollback plan? How do you recover if deployment fails?
- What dependencies change? New database migrations, configuration changes, or infrastructure updates?
For small deployments, planning might be a checklist in a shared document. For larger operations, it's a formal review process. Either way, planning prevents surprises.
Build Phase
Building transforms source code into a runnable artifact.
Example workflow:
# Check out the code to deploy
git checkout v1.2.3

# Run tests to catch bugs before production
npm run test
npm run lint

# Build the application
npm run build

# Create a container image or deployment package
docker build -t myapp:v1.2.3 .
Build phase responsibilities:
- Run automated tests. Unit tests, integration tests, security scans. If tests fail, stop—don't deploy broken code.
- Compile and optimize. Convert source code to an efficient runtime format.
- Create reproducible artifacts. A Docker image, compiled binary, or versioned package that's identical every time you build it.
- Tag and version everything. Link your deployment artifact to specific source code, ensuring traceability.
The output of the build phase is a deployment artifact: something ready to run anywhere the target environment exists.
Deploy Phase
Deployment moves the artifact to production and starts it.
Simple example:
# Copy the application to the server
scp myapp-v1.2.3.tar.gz user@production-server:/opt/myapp/

# SSH to the server and extract
ssh user@production-server "cd /opt/myapp && tar -xzf myapp-v1.2.3.tar.gz"

# Stop the old version and start the new one
ssh user@production-server "systemctl restart myapp"
Deploy phase considerations:
- Minimize downtime. Use strategies like blue-green deployment or rolling updates to avoid interrupting users.
- Handle dependencies. Database migrations, configuration updates, or prerequisite services must be ready.
- Verify readiness. Health checks confirm the new version is responding correctly before finishing.
- Rollback capability. Keep the previous version running so you can quickly switch back if problems occur.
Monitor Phase
Deployment doesn't end when the process completes. Monitoring detects whether the new version works correctly.
Key metrics to track:
- Application logs. Error rates, warning messages, unusual patterns.
- Resource usage. CPU, memory, disk I/O. Sudden spikes might indicate a bug or performance regression.
- Response times. Are API endpoints slower after the update?
- Error rates. Are more requests failing now than before?
- User-facing metrics. Are users able to complete their workflows?
Example monitoring command:
# Check recent logs for errors
ssh user@production-server "tail -100 /var/log/myapp/error.log | grep -E 'ERROR|FATAL'"

# Monitor resource usage in real-time
ssh user@production-server "top -b -n 1 | head -20"
If monitoring reveals problems, the team can:
- Investigate root cause. Is it a code bug, missing configuration, or resource constraint?
- Trigger rollback. Revert to the previous version if the new one is critically broken.
- Deploy a fix. Run another deployment cycle if the problem can be quickly patched.
A complete monitoring setup includes automated alerts so you don't have to manually check logs. When error rates spike, CPU usage becomes critical, or response times degrade, the system notifies the team immediately.
## Deploying Applications to Edge Devices and Home Servers
Deployment becomes more interesting—and more challenging—when your target infrastructure isn't a traditional data center.
Deploying to Raspberry Pi and Single-Board Computers
Raspberry Pi devices are popular for hobby projects, home automation, and distributed deployments. They present unique constraints:
- Limited resources. A Raspberry Pi 4 has 4GB RAM and runs on ARM architecture. Multi-gigabyte container images don't fit.
- Inconsistent connectivity. Home internet connections experience intermittent outages or network changes.
- Network complexity. Many home networks use CGNAT (Carrier-Grade Network Address Translation), which blocks incoming connections and makes traditional deployments impossible.
Practical deployment approach for Raspberry Pi:
# On your development machine, build for ARM architecture
docker buildx build --platform linux/arm64 -t myapp:rpi-v1.0 .

# Push to a registry the Pi can access
docker push myapp:rpi-v1.0

# On the Raspberry Pi, pull and run
ssh pi@192.168.1.100 "docker pull myapp:rpi-v1.0 && docker run -d myapp:rpi-v1.0"
Handling CGNAT: Carrier-Grade NAT blocks inbound connections. Solutions include:
- Outbound tunneling. The device initiates a persistent connection to a relay server you control. Traffic flows through that tunnel, bypassing CGNAT.
- Polling-based deployment. Instead of pushing updates to the device, the device periodically polls a central server asking "any updates for me?"
- Reverse SSH. The device maintains a reverse SSH tunnel, letting you SSH back into it even behind CGNAT.
Deploying to Home Servers
Home servers offer more resources than Raspberry Pi but still require careful deployment design.
Considerations:
- Persistent storage matters more. A home server likely runs 24/7 and stores important data. Deployments must preserve data across updates.
- Limited redundancy. A single home server has no backup. You need fast rollback capability.
- Custom networking. Home networks often use local DNS, dynamic IP addresses, and custom firewall rules.
- No managed services. Unlike cloud platforms, you manage every aspect: backups, security updates, monitoring.
Practical workflow for home server deployment:
# On the home server, set up a deployment directory
mkdir -p /home/server/myapp/{current,releases}

# Deploy a new release
cd /home/server/myapp/releases
git clone -b v1.0.0 --single-branch https://github.com/user/myapp.git v1.0.0
cd v1.0.0

# Build and test
npm install
npm run test
npm run build

# Switch to new version
cd /home/server/myapp
unlink current || true
ln -s releases/v1.0.0 current

# Restart the application
systemctl restart myapp

# Check health
curl http://localhost:8080/health
This pattern—maintaining a current symlink and a releases directory—enables quick rollback: just relink current to the previous release.
Managing Multiple Devices
Deploying to dozens of Raspberry Pi devices or home servers requires orchestration.
Approaches:
- Central orchestrator. A single control point runs deployment scripts across many devices. Tools like Ansible excel here.
- Pull-based updates. Each device polls a central server and pulls updates on schedule.
- Container orchestration. Kubernetes or lighter alternatives (K3s) can manage deployments across clusters.
For most edge deployments, simple orchestration works best:
# Deploy to 10 Pi devices in parallel using Ansible
ansible-playbook deploy-to-pis.yml --limit pi-1:pi-10
The deployment script on each Pi might be simple:
#!/bin/bash
set -e

echo "Deploying myapp to $(hostname)"

# Fetch the latest version
cd /opt/myapp
git fetch origin
git checkout origin/main

# Build and restart
docker build -t myapp:latest .
docker stop myapp || true
docker run -d --name myapp --restart unless-stopped -p 8080:8080 myapp:latest

echo "Deployment complete"
## Security Considerations in Application Deployment

Deployment is where code meets production—where security vulnerabilities become real exploits. Security must be embedded into every phase.
Zero-Trust Security Principles
Traditional security assumed a trusted internal network: anything inside the firewall is safe, anything outside is dangerous. Zero-trust rejects this assumption. Every request, every device, and every connection is treated as potentially hostile, regardless of origin.
Zero-trust principles for deployment:
- Verify every identity. Don't trust a server just because it has your IP address. Authenticate using cryptographic keys, not just SSH keys stored on the server.
- Encrypt all communication. All traffic—between your laptop and the deployment server, between servers, between containers—uses TLS encryption.
- Least privilege access. A deployment script has only the permissions it needs. If it's deploying a web server, it doesn't need database administrator access.
- Audit everything. Every deployment, every configuration change, and every access is logged.
Example: Zero-trust deployment authentication
Instead of allowing SSH from any user with the right key, use mutual TLS:
# Generate client certificate
openssl req -x509 -newkey rsa:4096 -keyout client-key.pem -out client-cert.pem

# Deploy using client certificate
curl --cert client-cert.pem --key client-key.pem \
  https://deploy-api.example.com/deploy \
  -X POST -d '{"version":"v1.2.3"}'
The deployment API verifies both the client certificate and the server certificate. Neither side trusts the other without cryptographic proof.
Secrets Management
Deployments often require secrets: database passwords, API keys, encryption keys. Mishandling secrets is a common source of breaches.
Dangerous patterns:
- Hardcoding secrets in code or configuration files.
- Storing secrets in Git repositories (even private ones; Git history is permanent).
- Using identical secrets across all environments.
- Passing secrets through logs or monitoring systems.
Secure patterns:
- Secrets vault. Store secrets in a dedicated system (HashiCorp Vault, AWS Secrets Manager) that's restricted to authorized services.
- Runtime injection. Secrets are provided to the application at runtime, never stored on disk.
- Short-lived credentials. Instead of long-lived passwords, use temporary tokens that expire.
- Audit trails. Log every access to secrets (but not the secrets themselves).
Example secure deployment:
#!/bin/bash
set -e

# Retrieve secrets from a vault (authenticated via mutual TLS)
DB_PASSWORD=$(curl --cert /etc/ssl/myapp/cert.pem \
  https://vault.internal/secret/db-password)

# Pass to application as environment variable, never log it
docker run -e DB_PASSWORD="$DB_PASSWORD" \
  -e LOG_LEVEL=info \
  myapp:v1.0.0

# Unset the variable immediately after use
unset DB_PASSWORD
Image and Artifact Integrity
When you deploy, you need assurance that the artifact hasn't been modified by an attacker.
Techniques:
- Cryptographic signing. Sign artifacts (container images, binaries) with a private key. The deployment system verifies the signature using a public key.
- Hash verification. Record the SHA-256 hash of deployment artifacts. Before deploying, verify the hash matches.
- Immutable registries. Store deployment artifacts in a registry that prevents modification or deletion of existing versions.
Example signing verification:
# Verify container image signature
cosign verify --key /etc/cosign/public.key myregistry.com/myapp:v1.0.0

# If the signature is valid, proceed with deployment
docker run myregistry.com/myapp:v1.0.0
Secrets and CGNAT Deployments
When deploying behind CGNAT (where inbound connections are blocked), zero-trust becomes even more critical. The device initiates the outbound connection, meaning the device authenticates the server before the server authenticates the device.
Secure CGNAT deployment:
# On home server behind CGNAT
# Initiate outbound connection to deployment relay
/opt/myapp/bin/relay-client \
  --relay-server deploy-relay.example.com \
  --cert /etc/ssl/myapp/client-cert.pem \
  --key /etc/ssl/myapp/client-key.pem
The relay server only accepts connections from devices with valid certificates. Rogue devices, even if they know the relay server address, cannot connect without proper authentication.
Deployment Access Control
Who can deploy? Limiting this prevents unauthorized changes.
Approaches:
- RBAC (Role-Based Access Control). Developers can deploy to staging; only DevOps can deploy to production.
- Approval workflows. Deployments to production require approval from a senior engineer or team lead.
- Deployment windows. Deployments only happen during maintenance windows (e.g., 2-4 AM on Saturdays).
- Audit logging. Every deployment is attributed to a specific user and logged immutably.
## Choosing Your Deployment Strategy: Immutable Infrastructure, Rolling Updates, and Blue-Green Deployments
Different applications have different availability requirements. A hobby project can accept brief downtime; a financial system cannot. Your deployment strategy determines how quickly you can update and how much disruption users experience.
Immutable Infrastructure
Immutable infrastructure means deployment artifacts never change. To update, you create a new artifact and deploy it alongside the old one, then switch traffic.
Advantages:
- Predictability. Everyone runs identical versions; no configuration drift.
- Fast rollback. Just point traffic back to the previous artifact.
- Clean state. No accumulated configuration, log files, or temporary data from previous versions.
Disadvantages:
- Larger artifacts. Each deployment includes the entire application, even if only one file changed.
- Complexity. You need orchestration to manage multiple versions.
Example workflow:
# Build immutable image
docker build -t myapp:v1.2.3 .
docker push myregistry.com/myapp:v1.2.3

# Deploy new version on separate container
docker run -d --name myapp-v1.2.3 \
  --expose 8080 \
  myregistry.com/myapp:v1.2.3

# Route traffic to new container using a load balancer
curl -X POST http://load-balancer:8080/route \
  -d '{"backend":"myapp-v1.2.3"}'

# Keep old container running for quick rollback
docker start myapp-v1.2.2
Rolling Updates
Rolling updates gradually replace old instances with new ones. If you run 5 application servers, you update 1 at a time, verifying it works before updating the next.
Advantages:
- Minimal downtime. Users are always routed to running instances.
- Easy rollback. Stop deploying and the old instances keep running.
- Resource efficient. No need to maintain two complete copies of the application.
Disadvantages:
- Complexity. You need orchestration to coordinate updates and health checks.
- Longer deployment time. Updating 50 instances takes longer than switching all at once.
- Partial state consistency. During rollout, some users hit v1.0 while others hit v1.1.
Example workflow:
# Orchestration system (e.g., Kubernetes) manages rolling updates
kubectl set image deployment/myapp \
  myapp=myregistry.com/myapp:v1.2.3 \
  --record

# Kubernetes automatically:
# 1. Starts a new pod with v1.2.3
# 2. Routes traffic away from an old pod
# 3. Terminates the old pod
# 4. Repeats until all pods run v1.2.3

# Monitor progress
kubectl rollout status deployment/myapp

# Rollback if needed
kubectl rollout undo deployment/myapp
Blue-Green Deployments
Blue-green deployment maintains two complete production environments: blue (current) and green (new). You deploy to green, test it, then flip traffic from blue to green.
Advantages:
- Zero downtime. Traffic switches instantly; users don't see gradual rollout.
- Simple rollback. Keep blue running; if green fails, switch back immediately.
- Complete testing. Test the entire environment before users see it.
Disadvantages:
- Resource intensive. You maintain two complete production environments.
- Data synchronization. If users write data to blue during testing, green doesn't have it.
- Complexity. Coordinating two environments and traffic switching requires careful design.
Example workflow:
# Deploy to green environment
ssh green-server "cd /opt/myapp && git pull && npm run build"

# Run smoke tests
curl http://green-server:8080/health
curl http://green-server:8080/api/status

# If tests pass, switch traffic from blue to green
ssh load-balancer "curl -X POST http://localhost:8080/switch \
  -d '{\"from\":\"blue\",\"to\":\"green\"}'"

# Blue remains running for quick rollback
curl http://blue-server:8080/health

# If issues appear, switch back
ssh load-balancer "curl -X POST http://localhost:8080/switch \
  -d '{\"from\":\"green\",\"to\":\"blue\"}'"
Choosing the Right Strategy
Use immutable infrastructure when:
- You deploy frequently and need fast rollback.
- You use container orchestration (Docker, Kubernetes).
- You have consistent infrastructure (cloud instances, Kubernetes clusters).
Use rolling updates when:
- You have many instances and want gradual updates.
- Zero downtime is essential.
- You use orchestration platforms designed for it (Kubernetes, Docker Swarm).
Use blue-green deployment when:
- You need instant rollback capability.
- You want to test the entire environment before users see it.
- Your application has stateful data that's hard to synchronize.
For small deployments (single server or Raspberry Pi), blue-green is often simplest: maintain two directories (/opt/myapp/v1 and /opt/myapp/v2), deploy to the inactive one, test, then switch.
# Simple blue-green on a home server

# Current active version
ln -s /opt/myapp/v1.2.2 /opt/myapp/current

# Deploy to inactive version
cd /opt/myapp/v1.2.3
npm install && npm run build

# Test
curl http://localhost:8080/health

# Switch
unlink /opt/myapp/current
ln -s /opt/myapp/v1.2.3 /opt/myapp/current
systemctl restart myapp

# If problems, switch back
unlink /opt/myapp/current
ln -s /opt/myapp/v1.2.2 /opt/myapp/current
systemctl restart myapp
## Frequently Asked Questions
What is the difference between application deployment and application release?
A release is a versioned package of code and configuration ready to be deployed. A deployment is the act of installing that release in a target environment. You create one release; you might deploy it to staging, then to production, then to a disaster recovery site. Conversely, you might release v1.0 but not deploy it yet, waiting for a maintenance window.
Can I deploy applications to Raspberry Pi or devices behind CGNAT?
Yes. Raspberry Pi devices can run full applications, though you must consider resource constraints and build for ARM architecture. CGNAT (where devices are behind carrier-managed NAT) blocks inbound connections, so traditional push-based deployment doesn't work. Solutions include pull-based deployment (device polls for updates), outbound tunneling (device maintains a persistent connection to a relay), or reverse SSH. Open-source deployment platforms designed for edge devices handle these scenarios natively.
What makes open-source deployment platforms different from commercial PaaS?
Open-source platforms give you full control: deploy anywhere, use open standards, own your data, avoid vendor lock-in. Commercial PaaS (Platform-as-a-Service) abstracts infrastructure details, letting developers focus on code, but at the cost of flexibility and control. Open-source requires more configuration and operational knowledge; PaaS is easier but less customizable. Neither is universally better—it depends on your priorities and team capabilities.
How do I automate application deployments with git push?
Use webhooks and a deployment pipeline. When you push to your Git repository, the hosting service (GitHub, GitLab) sends a webhook to a deployment server. The server pulls the latest code, runs tests and builds, and deploys the artifact. Example: push to the main branch triggers automated testing; if tests pass, the pipeline automatically deploys to production. This requires setting up a deployment server and configuring the Git platform's webhooks.
What's the simplest deployment strategy for small teams or home servers?
Blue-green deployment on a single server is straightforward. Maintain two directories: one for the current version, one for the new version. Deploy to the inactive directory, test it, then switch a symlink. If problems occur, the symlink points back to the previous version. This requires no orchestration complexity and enables instant rollback. Alternative: simply version your deployment directory and use systemd or supervisor to restart your application.
Why is zero-trust security important for self-hosted deployments?
Self-hosted deployments (whether on home servers or Raspberry Pi devices) often operate on untrusted networks (home internet, public WiFi, networks behind CGNAT). Zero-trust security—cryptographic authentication, encryption, least-privilege access—ensures that even if the network is compromised, deployments remain secure. Traditional network-perimeter security ("trust everything inside the firewall") doesn't work for edge deployments. Zero-trust treats every connection as potentially hostile and verifies every request, protecting deployments even from insider threats or compromised network segments.
## Conclusion
Application deployment is both a technical process and a strategic capability. Well-designed deployment processes accelerate development, reduce risk, and enable organizations to respond quickly to changes and problems. Whether you deploy to cloud infrastructure, home servers, or Raspberry Pi devices, the fundamental workflow remains the same: plan what you're deploying, build reproducible artifacts, deploy to production safely, and monitor for problems.
The deployment landscape has evolved beyond traditional enterprise models and expensive PaaS platforms. Today, lightweight self-hosted deployment combines the simplicity of push-button deployment with the control and cost-efficiency of owning your infrastructure. Open-source tools, Git-based workflows, and zero-trust security make this approach accessible to small teams and solo developers.
Ready to deploy your first application? Start with Piper's git push deployment on your own hardware—no vendor lock-in, full control, and instant HTTPS for any device. Whether you're running on a home server, a Raspberry Pi, or anything else with Linux, Piper makes deployment straightforward and secure.